
How To Do Your Lips Like A Pro

Ever wondered how to get that effortlessly plush, polished pout like the pros? Great news - it’s all in the technique, and today I’m walking you through one of my favorite lip routines straight from a recent Instagram reel.
Whether you’re prepping for a night out, a photoshoot, or just want your everyday glam to hit a little different, here’s a step-by-step guide to achieving lips that look defined, dimensional, and downright luxe.
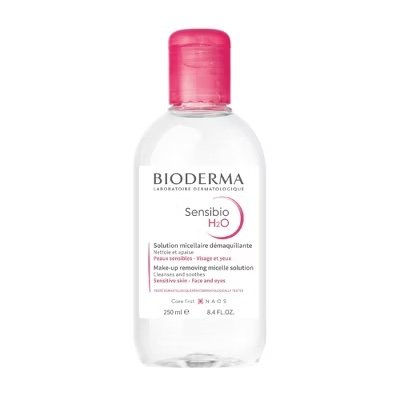
Step 1: Start Fresh
Begin by removing any leftover makeup or balm with micellar water. This ensures your lips are clean, smooth, and ready to hold onto product for longer wear and better blending. I recommend using a soft cotton pad and being gentle - this area is delicate!
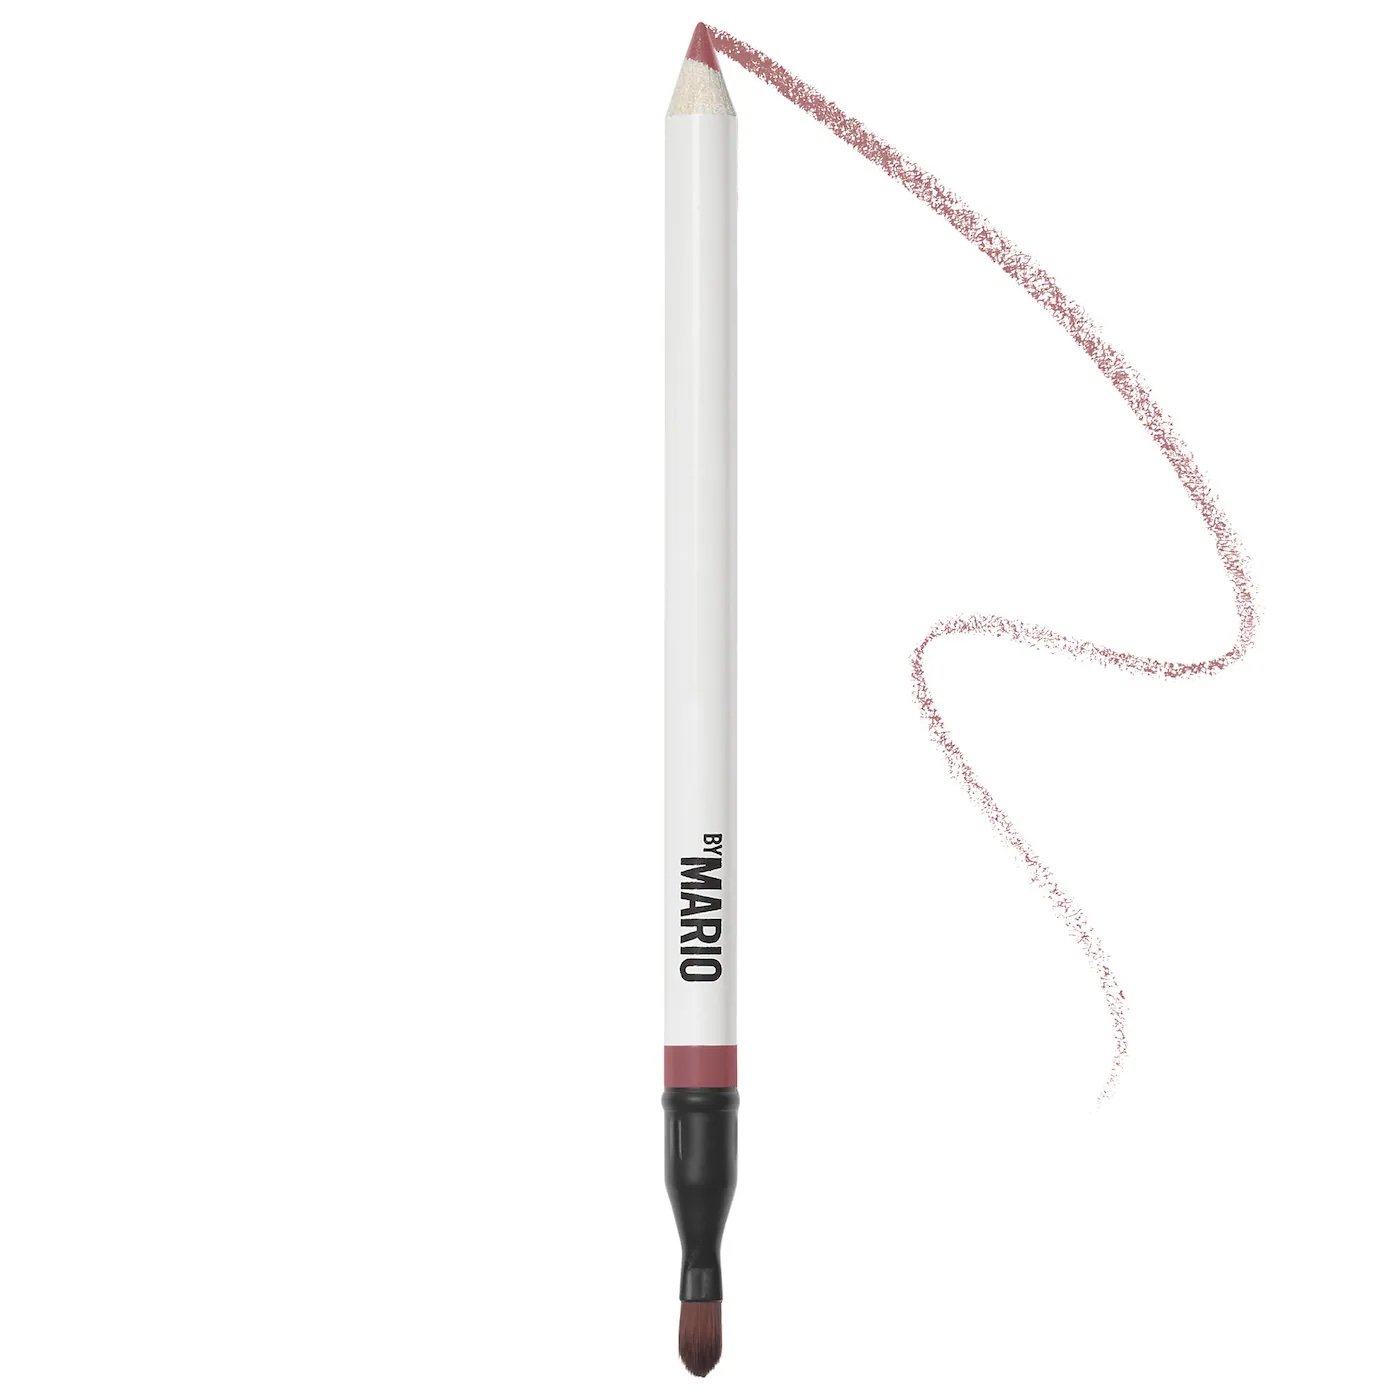
Step 2: Line with a Base Shade
Next, define the shape of your lips using a neutral-toned liner. In the reel, I used Makeup by Mario’s Lip Pencil in Smokey Pink, which is perfect for adding natural-looking structure without harsh lines. Start at the cupid’s bow and work outward, following your natural lip line.
Step 3: Blend the Liner
Don’t leave those lines untouched! Take a small detail brush and blend the liner slightly inward to soften edges and create a seamless gradient. This not only avoids the dreaded “lined lip” look but also lays a beautiful base for layering.
Step 4: Fill in with a Lighter Shade
To create dimension and a fuller effect, fill in the center of your lips with a lighter shade - Makeup by Mario in Hugh is what I used here. Tap or lightly apply this shade so it melds with your liner without overpowering it.

Step 5: Blend Again
Once your two tones are down, go back in with your detail brush and blend where the shades meet. This step is key to achieving that soft ombré effect that gives your lips depth and makes them appear naturally plump.
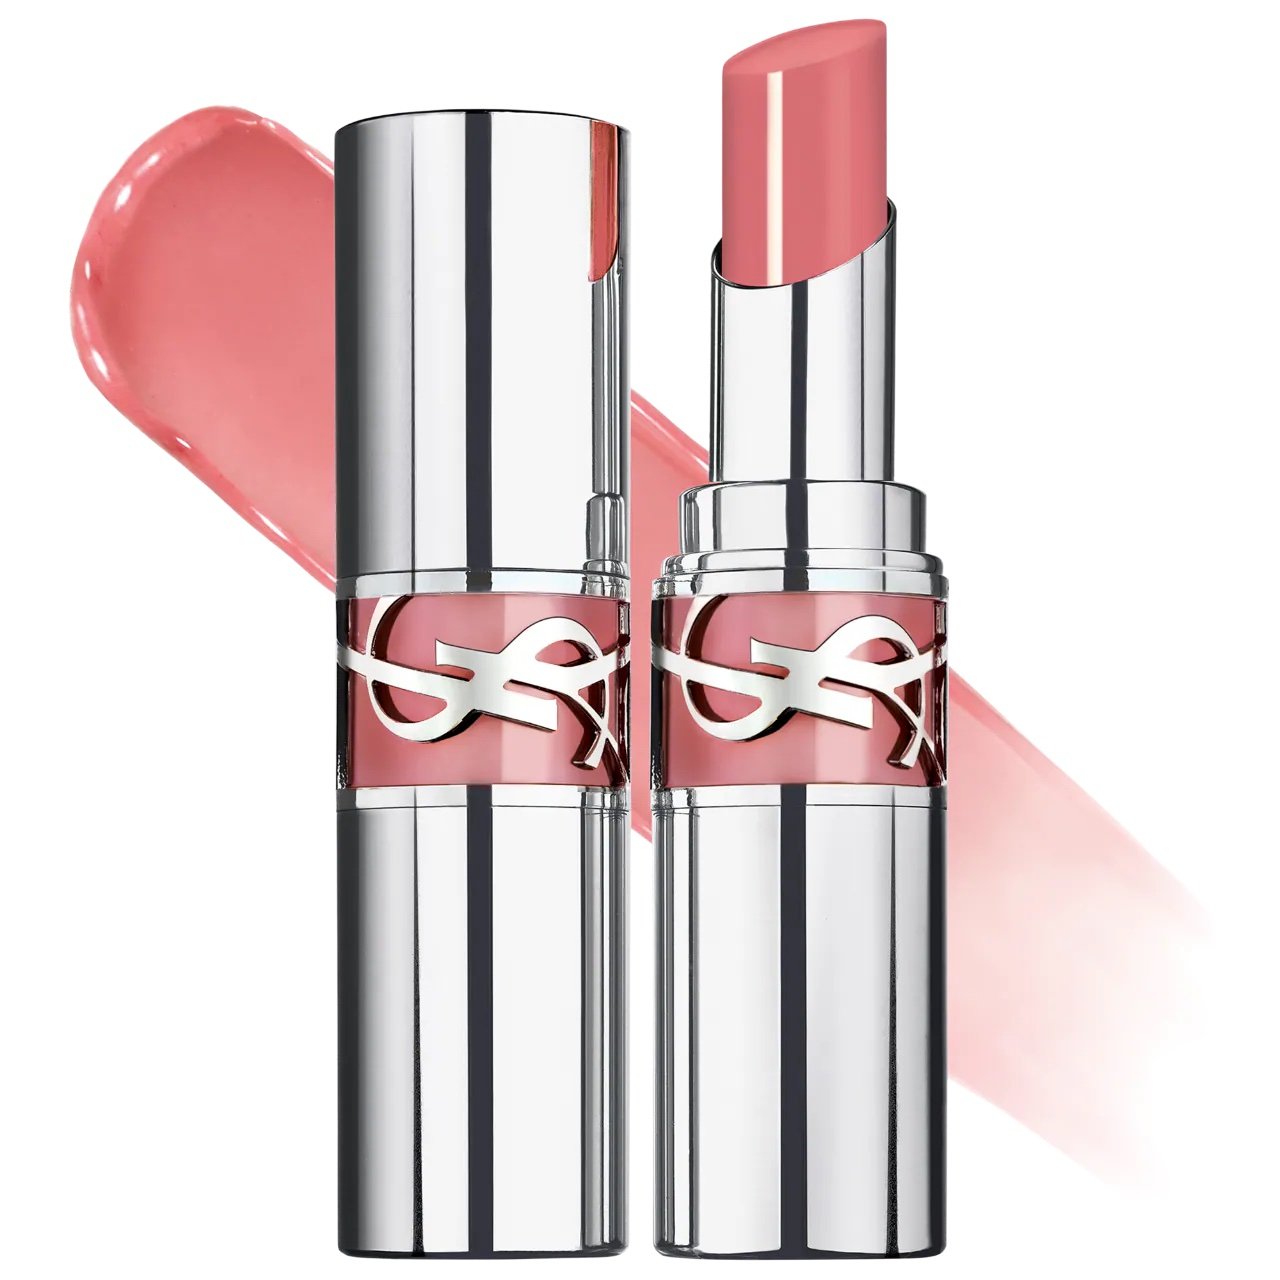
Step 6: Finish with Shine
Top it all off with your product of choice: lipstick, gloss, or tinted balm. For this look, I finished with the YSL Beauty Glossy Lipstick in 44 Nude Lavalliere, a flattering, high-shine nude that ties everything together and keeps lips looking hydrated and fresh.
Pro Tip:
For added longevity, blot once between layers and reapply your gloss. And if you want even more lift, dab a touch of highlighter on your cupid’s bow after application!
Try this technique the next time you want your lips to look professionally done - no filter needed. For more tutorials, trends, and tried-and-true tips, stay tuned to the Makeup by Caitlyn Michelle blog and follow me on Instagram.
xo, Caitlyn